Tutorial: Into the Sky by Natalie Maddon
I will start off with saying that there is not a whole lot of rhyme or reason to many of my images and I go back and forth between apps about a billion times during my process. I will do my best to make sense of the madness.
Apps used: Snapseed, Juxtaposer, Image Blender, LensLight, Pixlromatic+, Noir, VSCO Cam
1) I first take all of the images that I am going to use in the photo and put them in Snapseed. I use the tune image function to get them to a similar tone by adjusting the brightness, ambiance, white balance, contrast, and saturation. I like my inages to have a watercolor effect so most of them get desaturated a few times and I take most of the contrast out as well.
2) I opened the background image with the cracked dirt and added a hole to the ground in Juxtaposer. There is a soft blur erase that I like to use to soften the image.

3) Once the individual images are to my satisfaction, I bring them to Blender. In Blender, I use the arrange and mask functins by tapping the screen. Arrange does just that; put the top image where you want it to lay on the bottom image. The mask function is used to erase portions of the image that you don’t want there. Within the mask function, there are erase and draw options that each have the option for hard lines or a more subtle line. I go back and forth removing and adding portions of each image until they look smooth. In blender, you can also tap the screen and there is the option to flatten. You can only have two pictures in the app at a time unless you flatten two together then you can add another one on top.
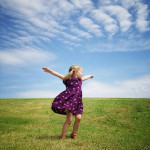
4) Once I have the basic background complete, I save the image and pull it up in Juxtaposer. I use Juxtaposer to cut out and layer images. I first load the background and then the top image that I just took standing in my backyard. In juxtaposer, on the top tool bar there is that little red boomerang thing. That will isolate the top image and make the background red so that you can see what is being erased. I zoom in to tiny pixels and earse first using the hard white circle at a small radius then I make the radius bigger and use the soft grey erase function so that the lines are soft and precise. This part takes lots of practice to make it so that it doesn’t look like you cut out a picture and glued it on top all kindergarden style. I learned the hard way, trust me. I also use the grey fuzzy erase tool once the image is cut out to blend it to the background so some of it shows through.

4) The combined images were then opened in snapseed. I used the center focus tool and blurred the background so that the focus would be on the image and the hole in the ground.

5) Next, I opened the image in Noir. I selected the grey tone and adjusted the dials for the different gradiants until the inage was darkened. This grey image will be used for the shadows.

6) The grey image is then layered on top of the other one in Juxtaposer. I make a mirror image and then layer it on top amd line it up then erase it completely. I then draw back in only where I want the shadow to be.

5) Once the pieces are all in place, I start working on the colors and lighting so that they look like they came from the same image. I first do another round of Snapseed adjusting the brightness, contrast, white balance, and ambiance. Once the overall image is the tones I want, I use selective adjust to pick dark and light spots where shadows would naturally fall.

6) I then open the image in Pixlromatic+ and pick a film that I like. The one I used on this image ( and many others) was Aladin. Once I get a color scheme that looks unified, I open the picture in LensLight. In this picture I used the sun beam effect and then the cloud rays. I save that image and then start another one in Noir. I used the circular beam on the brown tone and adjusted the photo so that there was lots of contrast and dark tones. I then bring both the light soft version and the dark contrasted version into Blender. With the two images in blender, I mask out completely the dark version and then use the draw function to add shadows where I want them.


7) The last step I used was to put the picture in VSCO Cam and added the final filter. I like number 6 the best. I

My biggest suggestion is to save each change so that you can go back if necessary. I save a number of different versions of each picture and go back and forth between them and if I like one part of one version but something better from another version, I blend them together and erase out what pieces I don’t like.

About Author
Latest stories
 StoriesJune 21, 2015A Note to a Father
 StoriesNovember 6, 2014Not So Nice
 StoriesJuly 2, 2014Storyteller Series: Ayanah
 StoriesJune 10, 2014Restoring American Beauty

Awesome tutorial!!! Your work fascinates me. Thank you so much for sharing your process so freely!
You are so welcome, I am glad you enjoyed it 🙂
What a fantastic looking photo,awesome editing tips, well done.
Thank you, I appreciate it!
I love that you have given us a sneak peek behind your editing process! Your photography is still like a dream world to me! keep doing what you do because I think its amazing!
Thanks so much Jo! I am going to put together a few more. I appreciate the encouragement!
One of the best tutorials for creating photographic art on iPhone apps I have found, truly brilliant work! Thankyou so much for sharing your creative process!
Thanks so much Clayton. You are quite welcome.
Feel like you’re being followed? Great piece miss natty Ann … You teach as well as you create.
Best to you …we’ll watch for more
@winterhill